Send Email in Next.js via Netlify & AWS SES (2026)
To send emails in a Next.js app via Netlify, the most efficient method in 2026 is using AWS SES as your SMTP provider and Netlify Functions as your serverless execution layer. This stack allows you to bypass expensive third-party platforms while maintaining 99% deliverability and full control over your HTML templates.
In this guide, we provide the exact production-tested code we use at CorgenX to handle contact forms, lead captures, and automated PDF delivery. You will learn to verify your domain in SES, configure Nodemailer in a Netlify environment, and build "bulletproof" HTML templates that won't break in Gmail Dark Mode or Outlook.
Here is what this guide covers:
- Why AWS SES + Netlify Functions is the right choice for Next.js email in 2026
- Setting up and verifying your domain in AWS SES
- Getting out of sandbox mode for production sending
- Creating SMTP credentials for Nodemailer
- Writing your first Netlify Function to send email
- Building email-client-safe branded HTML templates
- Handling dark mode in Gmail and Outlook
- Environment variables and deployment checklist
 AWS SES + Netlify Functions Email Guide
Why AWS SES + Netlify Functions?
Before diving into setup, it is worth being clear about why this stack makes sense over alternatives like SendGrid, Resend, or Postmark.
Cost at scale is the main answer. AWS SES charges $0.10 per 1,000 emails with no monthly base fee. If you send 10,000 emails a month — a reasonable volume for a growing product — that is $1. SendGrid's free tier caps at 100 emails per day; its paid plans — check current pricing at sendgrid.com/pricing. For any application that is already on AWS (and most production Next.js apps eventually are), SES is the obvious economic choice.
Control is the second reason. With SES, you own the sending infrastructure. Your templates, your bounce handling logic, your suppression lists — nothing is abstracted behind a dashboard you do not control. For GDPR-conscious businesses or applications with specific data residency requirements, this matters significantly.
Netlify Functions fit naturally because they are just AWS Lambda under the hood, deployed alongside your Next.js site with zero additional infrastructure. Your email logic lives in the same repository as your frontend — no separate backend service, no extra deployment pipeline, no CORS configuration.
Part 1: Setting Up AWS SES
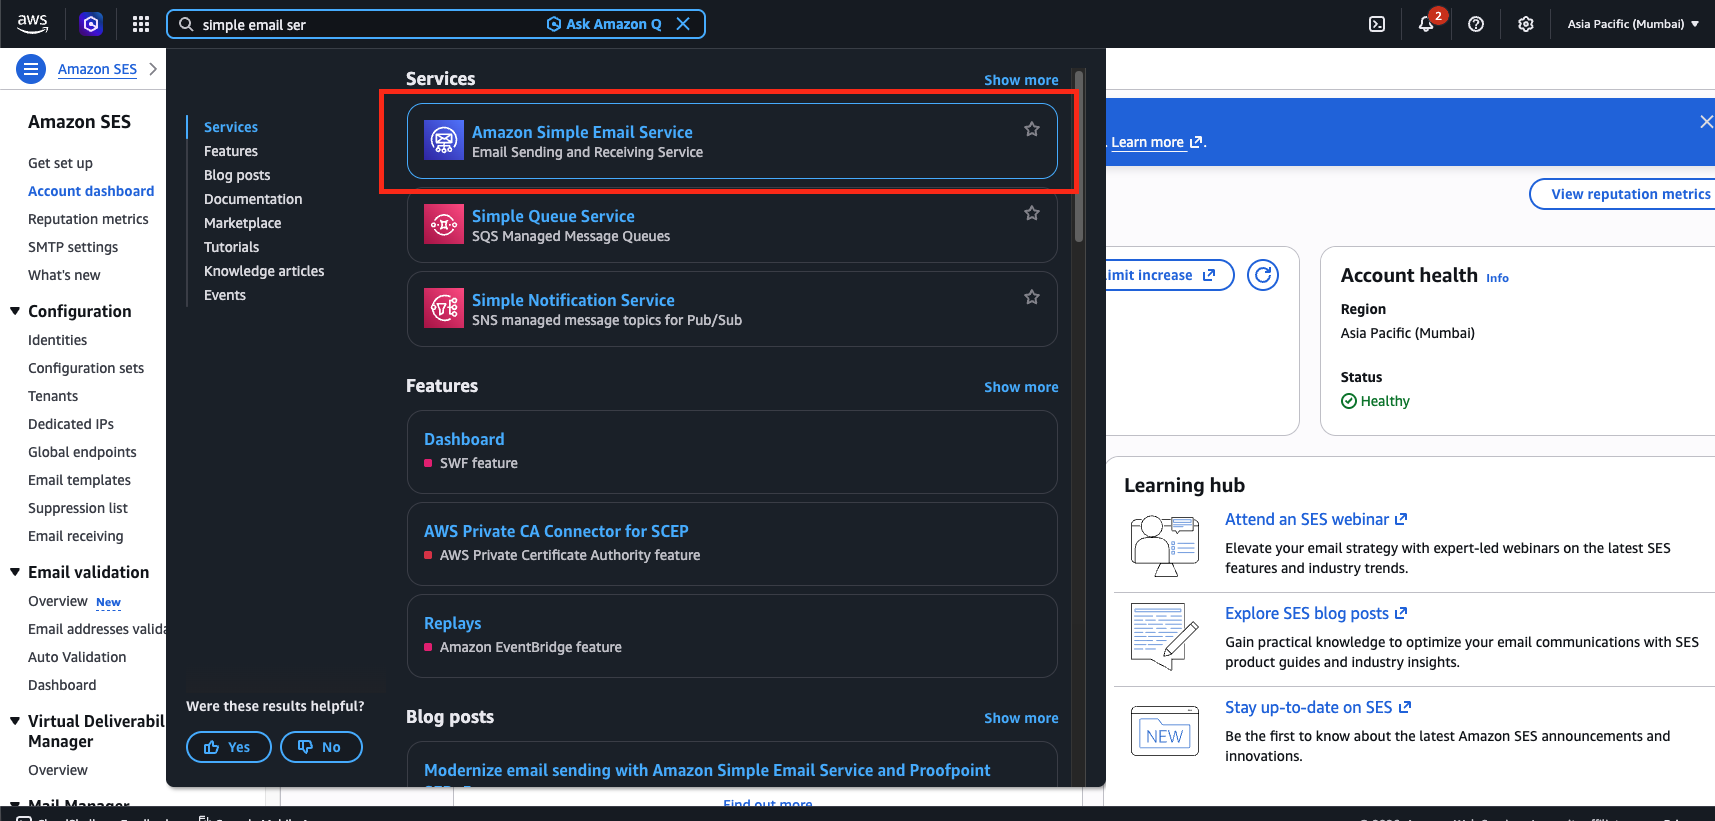
Step 1 — Navigate to SES in the AWS Console
Log into your AWS account and search for Simple Email Service in the top search bar. Make sure you are in the correct region — SES is region-specific, and all your SMTP credentials, verified identities, and sending quotas are tied to the region you select.
For most applications in South Asia, use Asia Pacific (Mumbai). For Europe, use EU (Ireland). For North America, use US East (N. Virginia).
Step 2 — Verify Your Sending Domain
In the SES sidebar, go to Configuration → Identities → Create Identity.
Select Domain (not Email Address — domain verification is broader and covers all email addresses on your domain).
Enter your domain — for example, yourdomain.com — and click Create Identity.

AWS will generate a set of DNS records you need to add to your domain:
- 3 CNAME records for DKIM (DomainKeys Identified Mail) — these cryptographically sign your outgoing emails so receiving servers can verify they genuinely came from you
- 1 MX record for the custom MAIL FROM domain — improves deliverability by making the envelope sender match your domain
- 1 TXT record for SPF — tells receiving mail servers that AWS SES is authorized to send on behalf of your domain
Add all of these in your DNS provider — Cloudflare, Route 53, GoDaddy, Namecheap, or wherever your domain's DNS is managed. DNS propagation typically takes 5 to 30 minutes, though it can occasionally take up to 24 hours.
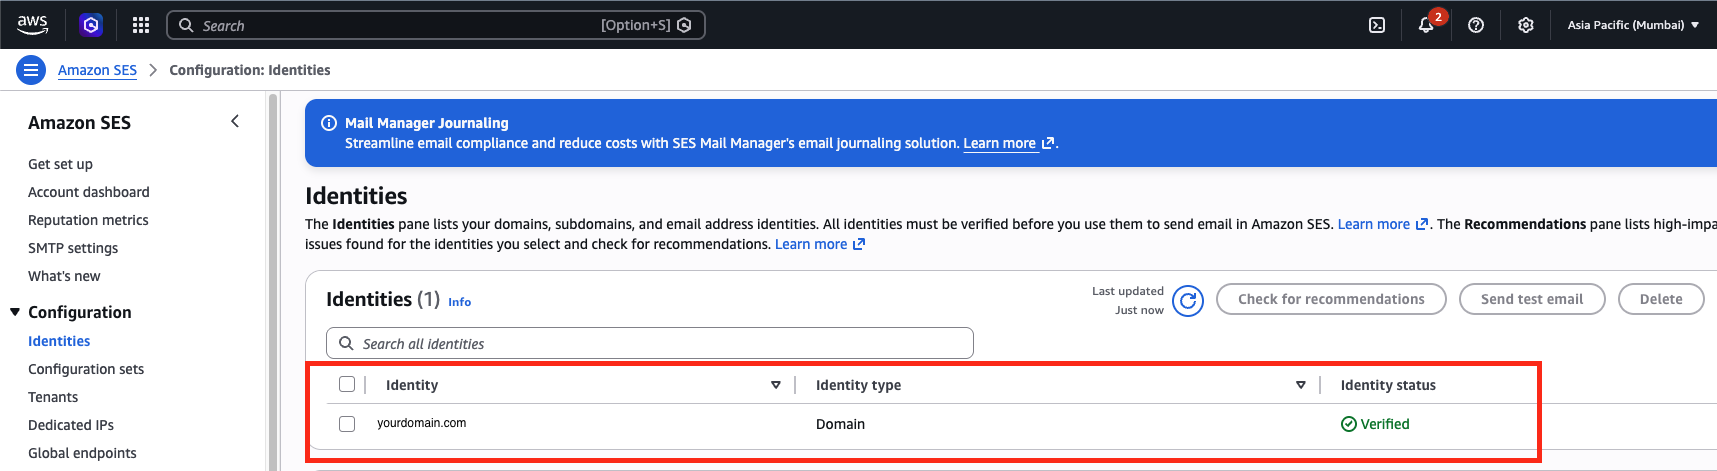
Once propagation is complete, your identity status will show Verified with a green checkmark. At this point, SES can send emails on behalf of any address at your domain — hello@yourdomain.com, noreply@yourdomain.com, anything you configure.
Step 3 — Request Production Access
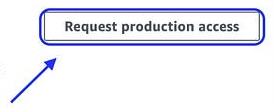
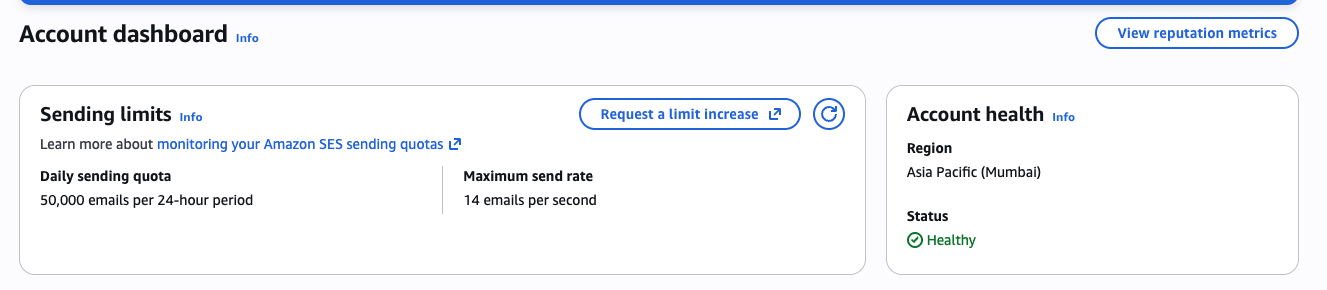
By default, every new SES account starts in Sandbox mode. In sandbox, you can only send emails to addresses you have individually verified in SES — which is fine for development testing but completely unusable in production.
To move to production, navigate to SES → Account Dashboard and click Request production access.
Fill in the form honestly:
- Mail type: Transactional
- Website URL: your application's URL
- Use case description: Describe exactly what you are sending — contact form notifications, download confirmations, etc.
- Expected daily volume: Your realistic estimate
- Bounce and complaint handling: Explain that you are sending only to opted-in users or users who initiated contact
AWS reviews these requests manually. Approval typically comes within 24 hours. Once approved, your daily sending quota jumps from 200 to 50,000 emails per day (or higher if you request more), and you can send to any email address in the world.
Step 4 — Create SMTP Credentials
Your Netlify Function will connect to SES via SMTP using Nodemailer. To get SMTP credentials, go to SES → SMTP Settings in the sidebar.
Click Create SMTP Credentials. This creates a dedicated IAM user with the ses:SendRawEmail permission — exactly what Nodemailer needs.

After clicking Create, you will see a one-time display of:
- SMTP Username — starts with
AKIA... - SMTP Password — a longer string
Download or copy these immediately. AWS will never show the password again. If you lose it, you must create new credentials.
Also note your SMTP endpoint from this page — it looks like email-smtp.ap-south-1.amazonaws.com (the region slug matches the region you chose). You will need this in your Nodemailer configuration.
Part 2: Setting Up Your Netlify Function
Project Structure
Netlify Functions live in a netlify/functions/ directory at the root of your Next.js project. Create the folder if it does not exist:
your-nextjs-app/
├── app/
├── public/
├── netlify/
│   └── functions/
│       ├── contactMail.js
│       └── sendResource.js
├── netlify.toml
└── package.json
Configure netlify.toml
If you do not already have a netlify.toml at your project root, create one. This tells Netlify where your functions live and how to build your Next.js app:
[build]
  command = "npm run build"
  publish = ".next"

[functions]
  directory = "netlify/functions"

[[plugins]]
  package = "@netlify/plugin-nextjs"
Install Nodemailer
In your project root, install Nodemailer:
npm install nodemailer
Set Your Environment Variables
In your Netlify dashboard, go to Site configuration → Environment Variables and add the following:
SES_SMTP_USER=your_smtp_username_from_aws
SES_SMTP_PASS=your_smtp_password_from_aws
INTERNAL_RECEIVER_EMAIL=your@email.com
For local development, create a .env.local file in your project root with the same variables. Netlify CLI will pick these up automatically when you run netlify dev.
Part 3: Writing the Netlify Function
The Contact Form Handler
Here is a complete, production-ready Netlify Function that handles a contact form — sending a notification to your internal team and a confirmation to the user who submitted:
// netlify/functions/contactMail.js
const nodemailer = require('nodemailer');

exports.handler = async function (event) {
  if (event.httpMethod !== 'POST') {
    return { statusCode: 405 };
  }

  try {
    const { name, email, phone, message, url } = JSON.parse(event.body);

    if (!name || !email || !message) {
      return {
        statusCode: 400,
        body: JSON.stringify({ error: 'Missing required fields' }),
      };
    }

    const transporter = nodemailer.createTransport({
      host: 'email-smtp.ap-south-1.amazonaws.com', // Your SES region endpoint
      port: 465,
      secure: true,
      auth: {
        user: process.env.SES_SMTP_USER,
        pass: process.env.SES_SMTP_PASS,
      },
    });

    // Internal notification to your team
    const adminMail = {
      from: '"Your Brand" <hello@yourdomain.com>',
      to: process.env.INTERNAL_RECEIVER_EMAIL,
      replyTo: email,
      subject: `New Contact Form: ${name}`,
      html: buildAdminMail({ name, email, phone, message, url }),
    };

    // Confirmation to the user
    const userMail = {
      from: '"Your Brand" <hello@yourdomain.com>',
      to: email,
      replyTo: 'contact@yourdomain.com',
      subject: 'We received your request',
      html: buildUserMail({ name }),
    };

    await Promise.all([
      transporter.sendMail(adminMail),
      transporter.sendMail(userMail),
    ]);

    return {
      statusCode: 200,
      body: JSON.stringify({ success: true }),
    };

  } catch (err) {
    console.error('ContactMail error:', err);
    return {
      statusCode: 500,
      body: JSON.stringify({ error: err.message }),
    };
  }
};
Calling the Function from Your Frontend
In Next.js 15, if you are calling this from a form component, ensure the file includes the 'use client' directive at the top. Call the function like a standard API endpoint:
'use client';

// ... inside your component
const handleSubmit = async (e) => {
  e.preventDefault();

  const res = await fetch('/.netlify/functions/contactMail', {
    method: 'POST',
    headers: { 'Content-Type': 'application/json' },
    body: JSON.stringify({ name, email, phone, message, url: window.location.href }),
  });

  const data = await res.json();

  if (data.success) {
    setStatus('success');
  } else {
    setStatus('error');
  }
};
Netlify automatically routes /.netlify/functions/functionName to the corresponding file in your functions directory — no additional routing configuration needed. (Note: You could also use Next.js Server Actions to bypass the API route entirely, but keeping it as a Netlify Function allows for cross-platform API reuse if you ever detach your frontend.)
Part 4: Building Email-Client-Safe HTML Templates
This is where most developers get burned. Email HTML is not web HTML. Gmail strips <style> blocks from the <head>. Outlook uses the Microsoft Word rendering engine and ignores modern CSS. Mobile Gmail in dark mode rewrites your colors automatically.
The approach that works across all clients — Gmail, Outlook, Apple Mail, mobile — is to use table-based layouts with all styles inline, plus a specific set of dark mode overrides.
The Base Template Function
const LOGO_URL = 'https://yourdomain.com/assets/email-header.png';
function brandedTemplate({ preheader = '', bodyContent = '' }) {
return `
<!DOCTYPE html>
<html lang="en" xmlns="http://www.w3.org/1999/xhtml"
xmlns:v="urn:schemas-microsoft-com:vml"
xmlns:o="urn:schemas-microsoft-com:office:office">
<head>
<meta charset="UTF-8" />
<meta name="viewport" content="width=device-width, initial-scale=1.0" />
<meta http-equiv="X-UA-Compatible" content="IE=edge" />
<meta name="x-apple-disable-message-reformatting" />
<meta name="color-scheme" content="light" />
<meta name="supported-color-schemes" content="light" />
<!--[if mso]>
<noscript>
<xml><o:OfficeDocumentSettings>
<o:PixelsPerInch>96</o:PixelsPerInch>
</o:OfficeDocumentSettings></xml>
</noscript>
<![endif]-->
<style>
:root { color-scheme: light only; }
body, table, td, a {
-webkit-text-size-adjust: 100%;
-ms-text-size-adjust: 100%;
}
table, td { mso-table-lspace: 0pt; mso-table-rspace: 0pt; }
img { -ms-interpolation-mode: bicubic; border: 0; }
/* Gmail dark mode overrides */
[data-ogsc] .email-header,
[data-ogsc] .email-footer { background-color: #0f1e38 !important; }
[data-ogsc] .email-card { background-color: #ffffff !important; }
[data-ogsc] .footer-text { color: #aab4c4 !important; }
[data-ogsc] .body-primary { color: #222222 !important; }
[data-ogsc] .body-secondary { color: #444444 !important; }
[data-ogsc] a { color: #1a6bbf !important; }
@media only screen and (max-width: 600px) {
.email-wrapper { width: 100% !important; }
.email-body { padding: 24px 16px !important; }
}
</style>
</head>
<body style="margin:0;padding:0;background-color:#e8e8e8;
min-height:100%;width:100% !important;">
<!-- Hidden preheader (inbox preview text) -->
<div style="display:none;font-size:1px;color:#e8e8e8;
max-height:0;overflow:hidden;">
${preheader}
</div>
<table width="100%" cellpadding="0" cellspacing="0" border="0"
style="background-color:#e8e8e8;">
<tr>
<td align="center" style="padding:32px 16px;" valign="top">
<!-- Header (separate table — prevents overflow:hidden clipping on mobile) -->
<table class="email-wrapper" width="520" cellpadding="0"
cellspacing="0" border="0" style="max-width:520px;width:100%;">
<tr>
<td class="email-header" align="center"
style="background-color:#0f1e38;padding:0;line-height:0;
border-radius:6px 6px 0 0;">
<a href="https://yourdomain.com" target="_blank"
style="display:block;line-height:0;">
<img src="${LOGO_URL}" alt="Your Brand" width="520"
height="100"
style="display:block;width:100%;max-width:520px;
height:auto;border:0;" />
</a>
</td>
</tr>
</table>
<!-- Body -->
<table class="email-wrapper email-card" width="520"
cellpadding="0" cellspacing="0" border="0"
style="max-width:520px;width:100%;background-color:#ffffff;">
<tr>
<td class="email-body email-card"
style="padding:36px 40px;background-color:#ffffff;
font-family:Arial,Helvetica,sans-serif;
font-size:15px;line-height:1.7;color:#222222;">
${bodyContent}
</td>
</tr>
</table>
<!-- Footer (separate table — same reason as header) -->
<table class="email-wrapper" width="520" cellpadding="0"
cellspacing="0" border="0" style="max-width:520px;width:100%;">
<tr>
<td class="email-footer" align="center"
style="background-color:#0f1e38;padding:18px 32px;
border-radius:0 0 6px 6px;">
<p class="footer-text"
style="margin:0;font-size:12px;color:#aab4c4;
text-align:center;">
© 2026 Your Company • Your City, Country
</p>
</td>
</tr>
</table>
</td>
</tr>
</table>
</body>
</html>`.trim();
}
Why Three Separate Tables Instead of One?
A common approach is to wrap the header, body, and footer inside a single container table with overflow:hidden and border-radius. This works on desktop but breaks on Gmail mobile — Gmail ignores overflow:hidden entirely, which means the header image bleeds out on the sides and the footer gets clipped.
The fix is to use three separate tables stacked vertically: one for the header, one for the body, one for the footer. Each table is self-contained, so there is nothing to clip. The border-radius is applied individually — 6px 6px 0 0 on the header, 0 0 6px 6px on the footer.
Dark Mode in Gmail
Gmail's Android and iOS apps in dark mode rewrite element colors automatically using their own algorithm. Your navy #0f1e38 header might shift to near-black. Your white body might shift to dark grey.
The fix uses the [data-ogsc] selector — Gmail's dark mode scopes its overrides under this attribute, so you can target it and pin your exact colors with !important. Every element that has a specific color gets a corresponding class and a [data-ogsc] override in the <style> block.
The color-scheme: light only declaration in :root tells Apple Mail and iOS Mail to never switch this email to dark mode at all — it always renders in light mode on those clients.
The Header Image
For the header, use a single image that:
- Is exactly 520px wide (matching the email container width)
- Has your brand's background color baked into the image itself — not just the
<td>background
When the image background matches the <td> background color precisely, there are no visible edges, gaps, or bleed — the header looks like a solid, seamless band on every client including Gmail dark mode.
Give the <img> tag both a width="520" HTML attribute (for pre-load sizing so Gmail knows the height before the image loads) and style="width:100%" for responsive scaling on small screens.
Part 5: Sending Attachments and PDFs
If your application delivers downloadable resources — guides, reports, templates — you can attach them directly in SES via Nodemailer:
const userMail = {
  from: '"Your Brand" <hello@yourdomain.com>',
  to: email,
  subject: 'Your guide is ready',
  html: buildResourceMail({ name, resourceName }),
  attachments: [
    {
      filename: 'your-guide.pdf',
      path: 'https://yourdomain.com/assets/your-guide.pdf', // Public URL
    },
  ],
};
For large files, it is better practice to send a download link in the email body rather than an attachment — attachments increase email size, affect deliverability scores, and some corporate email servers strip them entirely.
Part 6: Environment Variables and Deployment
Local Development with Netlify CLI
Install the Netlify CLI globally and use netlify dev instead of next dev. This emulates the Netlify Functions environment locally, including environment variable injection:
npm install -g netlify-cli
netlify dev
Your functions will be available at http://localhost:8888/.netlify/functions/functionName during local development.
Production Environment Variables
In your Netlify dashboard, go to Site configuration → Environment Variables and add:
| Variable | Value |
|---|---|
SES_SMTP_USER | Your SES SMTP username |
SES_SMTP_PASS | Your SES SMTP password |
INTERNAL_RECEIVER_EMAIL | Your team's notification email |
These are injected automatically into your Netlify Functions at runtime — never committed to your repository.
Deployment Checklist
Before going live, verify each of these:
- Domain status in SES is Verified (green checkmark)
- SES account is out of sandbox mode (production access granted)
- SMTP credentials are saved in Netlify environment variables
hello@yourdomain.com(or your sending address) is covered by the verified domain- Your
netlify.tomlhas the functions directory configured - Test email sent successfully in production after deploy
Common Errors and How to Fix Them
| Error | Cause | Fix |
|---|---|---|
Invalid login: 535 | Wrong SMTP credentials | Re-check SES_SMTP_USER and SES_SMTP_PASS — copy directly from AWS, no extra spaces |
Email address is not verified | SES still in sandbox | Request production access, or verify the recipient email in SES for testing |
Connection timeout | Wrong SMTP host | Use the endpoint matching your SES region — e.g. email-smtp.us-east-1.amazonaws.com for US East |
454 Throttling failure | Sending rate exceeded | SES has a default rate limit of 14 emails/second. Nodemailer doesn't natively queue, so for high-volume bursts, implement a queueing library like bottleneck, use the AWS SDK, or request a limit increase. |
Missing required fields | Body not parsed | Ensure Content-Type: application/json header is set in the fetch call from your frontend |
| White bleed on email header in Gmail mobile | Header image background doesn't match <td> color | Bake the background color into the image itself — match it exactly to your header <td> background |
| Duplicate unsubscribe emails | Multiple list memberships triggering per list | Check your newsletter list settings — "Unsubscribe user from All lists" sends one email per list |
Frequently Asked Questions
Do I need a dedicated AWS account for SES?
Yes. While Netlify Functions are AWS Lambda under the hood, you need your own AWS console access to manage SES identities, DKIM records, and sending quotas.
Why use Nodemailer instead of the AWS SDK?
Nodemailer is more intuitive for building complex HTML emails and handling attachments. It acts as a standardized bridge, making your code easier to test and maintain.
Will my emails go to spam if I use SES?
Not if you follow the verification steps. By configuring DKIM, SPF, and MX records during the identity setup, you prove to mailbox providers that you are a legitimate sender.
Can I send attachments like PDFs?
Absolutely. Our guide includes a method to attach files directly using the attachments array in your Nodemailer configuration.
How long does it take to get out of the SES Sandbox?
AWS typically reviews and approves production access requests within 24 hours, provided you explain your use case clearly.
What This Stack Costs
For a production application sending 10,000 emails per month:
| Service | Cost |
|---|---|
| AWS SES | ~$1.00/month |
| Netlify (Pro plan, optional) | check current pricing at netlify.com/pricing |
| Domain verification | Free |
| Total | ~$1 to $20/month depending on Netlify plan |
Compare this to SendGrid Pro — check current pricing at sendgrid.com/pricing — or Mailchimp Essentials — check current pricing at mailchimp.com/pricing. For any application beyond early-stage, SES wins on cost at every volume level above a few thousand emails per month.
How CorgenX Uses AWS SES + Next.js in Production
This is not a tutorial assembled from documentation. This is the email infrastructure we have deployed across multiple production applications — contact form handlers, PDF delivery systems, newsletter subscription flows, and transactional notification pipelines, all running on exactly this stack.
The branded HTML templates in this guide have been tested across Gmail desktop, Gmail mobile (Android and iOS in both light and dark mode), Apple Mail, Outlook 2019, and Outlook 365. The dark mode overrides work. The mobile responsiveness works. The Outlook table-based layout works.
If you are building a Next.js application and need a reliable, cost-effective email pipeline — or if you have an existing setup that is unreliable, expensive, or hard to maintain — talk to us. We can audit your current setup or build the entire email infrastructure from scratch as part of a broader engagement.
Built and tested with Next.js 15, Netlify Functions, AWS SES (Mumbai region), and Nodemailer 6.x. Tested across Gmail, Outlook, and Apple Mail in light and dark mode.
Related Articles
Ready to Scale?
Our high-performance web solutions and SEO strategies are designed to deliver results.
Check out our services