Sendy + AWS SES + Next.js Integration Guide (2026)
To integrate Sendy with WordPress and Next.js using AWS SES: install Sendy on a subdomain, connect it to your verified AWS SES account via IAM credentials, set up four mandatory cron jobs to run every 1-5 minutes, and call Sendy's subscribe API from your Next.js 15 frontend using a Server Action. This guide covers the full setup, security best practices, and every common error you will hit along the way.
If you have not set up AWS SES yet, start with our AWS SES + Next.js guide first — this guide picks up from there.
What Is Sendy?
Sendy is a self-hosted newsletter application built on PHP and MySQL. You install it on your own server, connect it to Amazon SES, and it handles everything — subscriber lists, campaigns, autoresponders, open/click tracking, bounces, and unsubscribes.
You buy it once ($69 one-time license — verify current pricing at sendy.co before purchasing, pricing may have changed), host it yourself, and pay only AWS SES for delivery — $0.10 per 1,000 emails. No monthly fees, no per-subscriber limits.
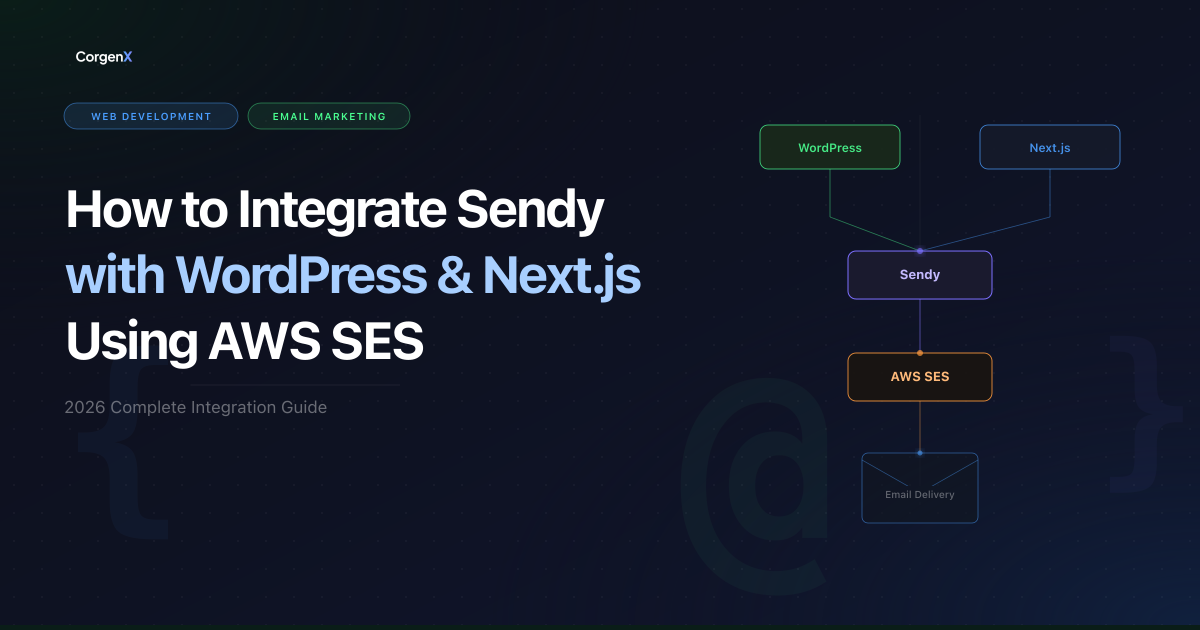
How the stack fits together:
- Your server runs the Sendy PHP app and MySQL database
- AWS SES handles email delivery
- Your Next.js frontend calls Sendy's API to subscribe users
- WordPress (if you use it) stays on its own subdomain, separate from Sendy
Prerequisites
- A domain with DNS access
- AWS account with SES production access and a verified domain
- A server running Apache (Sendy is not officially supported on Nginx)
- PHP 7.4+ with
mysqli,curl,curl_exec, andgettextenabled - MySQL on the same server as Sendy — not an external RDS
- Sendy license from sendy.co
Verify your server's PHP compatibility at https://your_sendy_url/_compatibility.php?i=1 after uploading files.
 Sendy + AWS SES + Next.js + WordPress Integration
Part 1: Installing Sendy
Install on a Subdomain — Not Inside WordPress
This is the most important rule. Never install Sendy inside your WordPress directory. WordPress's .htaccess overwrites Sendy's, breaking URL routing completely. Use a clean subdomain — newsletter.yourdomain.com or sendy.yourdomain.com.
Configure /includes/config.php
$app_path = 'https://newsletter.yourdomain.com'; // No trailing slash
$dbHost   = 'localhost';
$dbUser   = 'your_db_user';
$dbPass   = 'your_db_password';
$dbName   = 'your_db_name';
Technical Accuracy & "Silent Failures"
There are three common "gotchas" in the PHP/MySQL configuration that can break an installation without showing a direct error.
⚠️ 1. Config File Hygiene Check for empty lines before the
<?phptag or after?>inconfig.php. These invisible characters cause "Headers already sent" errors, which silently break redirects and logins.2. Straight vs. Curly Quotes Mac text editors (like TextEdit) often auto-convert straight apostrophes
'to curly quotes’. In PHP, curly quotes cause a fatal syntax error. Always use a dedicated code editor like VS Code or Cursor.3. MySQL "0 Recipients" Bug Many modern MySQL servers enable
ONLY_FULL_GROUP_BYby default. If this is active, Sendy may report "0 recipients" for your campaigns even if your list is full. You must remove it from yoursql_mode.
Run the Installer
Visit your Sendy URL. It will redirect to /_install.php — follow the steps to create your admin account and complete database setup. Delete _install.php from your server after installation.
Part 2: Connecting to AWS SES
In Sendy's Settings, enter:
- AWS Access Key ID and Secret — create a dedicated IAM user with
ses:SendEmailandses:SendRawEmailpermissions - AWS SES Region — use the region closest to your server's physical location. India/South Asia →
ap-south-1. Europe →eu-west-1. US →us-east-1. This directly affects sending speed. - From email — an address at your verified domain
- Sending rate — match your SES account's rate (default is 14 emails/second for most production accounts)
Part 3: Next.js 15 Subscribe Form (Modern Standard)
If you are using Next.js 15 with the App Router, you should handle subscriptions using Server Actions. This keeps your API key secure on the server and provides a seamless developer experience.
1. Create the Server Action
⚠️ Security Warning: Store your
SENDY_API_KEYin a.envfile and never prefix it withNEXT_PUBLIC_. If you use the prefix, Next.js will expose your secret key to the browser, allowing anyone to scrap your list or send unauthorized emails.
// app/actions/subscribe.ts
'use server'

export async function subscribeUser(formData: FormData) {
  const email = formData.get('email')
  const name = formData.get('name') || ''

  if (!email) return { success: false, message: 'Email is required.' };

  const params = new URLSearchParams({
    api_key: process.env.SENDY_API_KEY!,
    list: process.env.SENDY_LIST_ID!,
    email: email as string,
    name: name as string,
    boolean: 'true',
  });

  try {
    const response = await fetch(`${process.env.SENDY_URL}/subscribe`, {
      method: 'POST',
      headers: { 'Content-Type': 'application/x-www-form-urlencoded' },
      body: params.toString(),
      signal: AbortSignal.timeout(5000), // 5-second timeout
    });

    const text = await response.text();

    if (text === '1') return { success: true, message: 'Subscribed successfully!' };
    return { success: false, message: text };

  } catch (error) {
    console.error('Sendy API Error:', error);
    return {
      success: false,
      message: 'Service temporarily unavailable. Please try again later.'
    };
  }
}
2. Create the Client Form
'use client';
import { subscribeUser } from '@/app/actions/subscribe';
import { useState, useTransition } from 'react';

export default function NewsletterForm() {
  const [message, setMessage] = useState('');
  const [isPending, startTransition] = useTransition();

  const handleSubmit = async (formData: FormData) => {
    startTransition(async () => {
      const result = await subscribeUser(formData);
      setMessage(result.message);
    });
  };

  return (
    <form action={handleSubmit}>
      <input
        type="email"
        name="email"
        required
        placeholder="your@email.com"
        disabled={isPending}
      />
      <button type="submit" disabled={isPending}>
        {isPending ? 'Subscribing...' : 'Subscribe'}
      </button>
      {message && <p className={message.includes('successfully') ? 'text-green' : 'text-red'}>
        {message}
      </p>}
    </form>
  );
}
Alternative: Netlify Functions (Legacy/Specific Use Case)
If you are deploying to Netlify and prefer standalone functions, you can proxy your request like this:
// netlify/functions/subscribe.js
exports.handler = async (event) => {
  if (event.httpMethod !== 'POST') return { statusCode: 405, body: 'Method Not Allowed' };

  try {
    const { email, name } = JSON.parse(event.body);
    const params = new URLSearchParams({
      api_key: process.env.SENDY_API_KEY,
      list: process.env.SENDY_LIST_ID,
      email,
      name: name || '',
      boolean: 'true',
    });

    const response = await fetch(`${process.env.SENDY_URL}/subscribe`, {
      method: 'POST',
      headers: { 'Content-Type': 'application/x-www-form-urlencoded' },
      body: params.toString(),
    });

    const text = await response.text();
    return {
      statusCode: text === '1' ? 200 : 400,
      body: JSON.stringify({ message: text === '1' ? 'Subscribed' : text }),
    };
  } catch (err) {
    return { statusCode: 500, body: 'Internal Server Error' };
  }
};
Sendy API Response Codes
| Response | Meaning |
|---|---|
1 | Subscribed successfully |
Already subscribed. | Email already on the list |
Invalid list ID. | Wrong list hash |
Invalid API key. | Key mismatch |
Some fields are missing. | Missing POST parameters |
React Subscribe Form
'use client';
import { useState } from 'react';

export default function NewsletterForm() {
  const [email, setEmail] = useState('');
  const [status, setStatus] = useState(null);
  const [message, setMessage] = useState('');

  const handleSubmit = async () => {
    setStatus('loading');
    const res = await fetch('/.netlify/functions/subscribe', {
      method: 'POST',
      headers: { 'Content-Type': 'application/json' },
      body: JSON.stringify({ email }),
    });
    const data = await res.json();
    setStatus(res.ok ? 'success' : 'error');
    setMessage(data.message);
  };

  return (
    <div>
      <input
        type="email"
        value={email}
        onChange={(e) => setEmail(e.target.value)}
        placeholder="your@email.com"
      />
      <button onClick={handleSubmit} disabled={status === 'loading'}>
        {status === 'loading' ? 'Subscribing...' : 'Subscribe'}
      </button>
      {message && <p>{message}</p>}
    </div>
  );
}
Part 4: WordPress Integration
If WordPress is your public site, you have two options:
Embed Sendy's form HTML directly. Go to Sendy → Lists → your list → "Subscribe form" to get the HTML. Paste it into a Custom HTML block in WordPress. Simple, no code required.
Call Sendy's API via wp_remote_post() in a custom functions.php handler. This gives you full control over the form UI while keeping the API key server-side.
Either way, keep Sendy on its own subdomain. If your Next.js app is the public frontend, WordPress is not involved in the subscribe flow at all — use the Next.js form from Part 3 directly.
Part 5: Mandatory Cron Jobs (Sendy 6.x)
Sendy 6.x relies on four distinct cron jobs to handle different background tasks. If these aren't running, your newsletters won't send, CSVs won't import, and segments won't update.
1. Scheduled Campaigns (scheduled.php)
Frequency: every 1-5 minutes (*/5 * * * *)
This is the most critical job. It checks if any campaigns are due for sending.
*/5 * * * * php /home/user/public_html/sendy/scheduled.php > /dev/null 2>&1
2. Autoresponders (autoresponders.php)
Frequency: every 1 minute (* * * * *)
If you use drip campaigns or welcome emails, this must run every minute for timely delivery.
* * * * * php /home/user/public_html/sendy/autoresponders.php > /dev/null 2>&1
3. CSV Imports (import-csv.php)
Frequency: every 1 minute (* * * * *)
Handles the background processing of subscriber lists. Without this, your imports will stay at 0%.
* * * * * php /home/user/public_html/sendy/import-csv.php > /dev/null 2>&1
4. Segment Updates (update-segments.php)
Frequency: every 15 minutes to 1 hour (*/15 * * * *)
Updates your dynamic segments based on subscriber behavior or custom fields.
*/15 * * * * php /home/user/public_html/sendy/update-segments.php > /dev/null 2>&1
⚠️ The Cron Job Discrepancy (Critical Fix) While a 15-minute interval (
*/15) might seem sufficient, it is a common mistake that leads to a poor user experience. If yourautoresponders.phporscheduled.phpjobs run too slowly, a new subscriber could wait up to 14 minutes for a welcome email.Best Practice: Run
scheduled.php,autoresponders.php, andimport-csv.phpat 1–5 minute intervals (* * * * *or*/5 * * * *) to ensure a professional, real-time experience for your users.
If PHP cron still fails, switch to curl:
*/5 * * * * curl -L -s https://newsletter.yourdomain.com/scheduled.php > /dev/null 2>&1
To reset a stuck cron state, visit https://your_sendy_url/reset-cron.php, then revisit your list page to see fresh instructions.
Part 6: The 404 Error After Installation
Sendy uses Pretty URLs (/login not /login.php), handled by Apache's mod_rewrite via .htaccess. A 404 means something in that chain is broken.
Check 1 — Is .htaccess present?
FTP clients on Mac hide dot files. Enable "Show hidden files" and confirm sendy/.htaccess exists on the server.
Check 2 — Add RewriteBase
Open .htaccess and add after RewriteEngine On:
- Subfolder install (
yourdomain.com/sendy):RewriteBase /sendy - Subdomain install (
sendy.yourdomain.com):RewriteBase /
Check 3 — Set AllowOverride All in Apache
On self-managed servers, Apache often defaults to AllowOverride None, which ignores .htaccess entirely.
<Directory /var/www/html/sendy>
    AllowOverride All
</Directory>
Restart Apache after: sudo systemctl restart apache2
On Ubuntu, also enable the rewrite module: sudo a2enmod rewrite
Common Errors and Fixes
| Error | Fix |
|---|---|
| Campaign stuck in "Preparing" | Cron job for scheduled.php not running. Reset via /reset-cron.php and reconfigure. |
| Campaign stuck in "Sending" | Check SES Reputation Dashboard. Also disable browser extensions (Grammarly injects code) and re-create the campaign from scratch. |
| CSV import stuck at 0% | Cron job for import-csv.php not running. Same reset process. |
| "Invalid license or domain" | Server firewall blocking outgoing connections. Whitelist 162.243.225.110 (Note: this IP is Sendy's licensing server — verify it matches the current value in your Sendy installation before whitelisting) and amazonaws.com. |
| 500 Internal Server Error | Remove Options +FollowSymLinks from .htaccess. If still failing, check if putenv is disabled in PHP. |
| Login reloads with no error | Credentials are case-sensitive. Also check APP_PATH in config.php matches your exact domain including https:// and www. |
| SNS showing "PendingConfirmation" | Firewall blocking incoming Amazon connections. Whitelist amazonaws.com for incoming traffic, delete the pending subscriptions — Sendy will recreate them. |
| Campaign sent to "0 recipients" | ONLY_FULL_GROUP_BY enabled in MySQL. Remove it from sql_mode. |
| Blank page on install | Check mysqli is enabled, no curly quotes in config.php, no empty lines before <?php. |
Frequently Asked Questions
Does Sendy work on Nginx?
Officially no. Sendy is only supported on Apache. Nginx ignores .htaccess files, breaking Sendy's URL routing. You would need to proxy pass to Apache or manually rewrite the rules — neither is officially supported.
Can I use Amazon RDS as the database?
Not recommended. Sendy performs a high volume of real-time queries during bulk sending. Even a small 10ms network latency between your app server and an external database like RDS can cut your sending speed in half. For maximum delivery performance, always keep MySQL on the same physical server as your Sendy installation.
Why is sending slow?
Most likely causes: sending rate in settings is set to "1 email/second", SES region is far from your server, or the queue table has stale records. Clear it at https://your_sendy_url/clear-queue when no campaigns are running.
Where do I find my List ID for the API?
In Sendy: Lists → select your list → click "API Subscribe form" at the top. The list hash is shown there.
Deployment Checklist
- Sendy installed on a subdomain, not inside WordPress
APP_PATHinconfig.phpset correctly — no trailing slash.htaccesspresent and not overwritten by WordPressAllowOverride Allset in Apache config (self-managed servers)- SES domain verified, production access granted
- IAM credentials entered in Sendy Settings, correct region selected
- Cron job confirmed running — setup box gone from Define recipients page
- SNS subscriptions show "Confirmed" in AWS console
- Test campaign sent and received successfully
- Next.js subscribe form tested end-to-end
SENDY_API_KEY,SENDY_LIST_ID, andSENDY_URLset in environment variables
Tested with Sendy 6.x (this guide was written for 6.1.3 — check sendy.co for the latest version), AWS SES (Mumbai region), Next.js 15, Apache 2.4, PHP 8.2, and MySQL 8.0.
Related Articles
Ready to Scale?
Our high-performance web solutions and SEO strategies are designed to deliver results.
Check out our services